


Wordpress
Create new menus wherever you want on your WordPress website

Nov
In our WordPress, the theme we use supports a limited number of menu locations and only in specific places. But what if we need to create a new menu somewhere else? In the footer, the sidebar, the topbar… In this tutorial, we’ll go step by step on how to do it. It’s a bit long, but it’s worth learning so you have the freedom to place menus wherever you want 🙂
For this practice, we’ll create 2 menus in different locations and different templates. We’ll place the first one in the footer of the well-known Twenty Twelve theme and we’ll also create a new menu in the topbar of the X theme, a premium theme with many possibilities, but which by default doesn’t support menus in the topbar.
1 – Access Generate WP
The platform https://generatewp.com is truly amazing. It allows us to create the necessary code to do many things — even without knowing how to code! Take a look and see all the possibilities. But for now, let’s get to the point: creating our new menus!
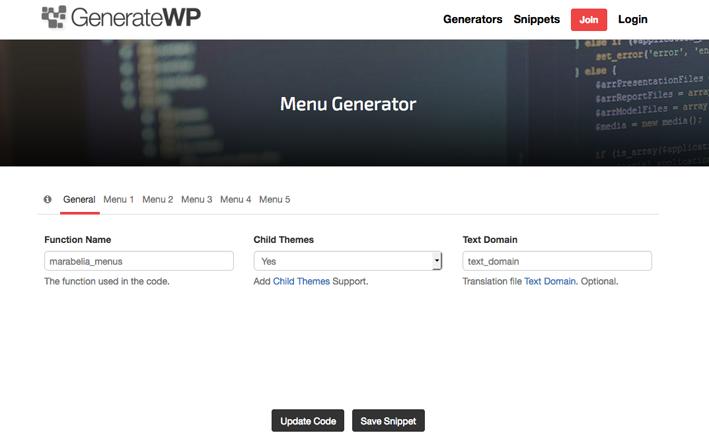
At https://generatewp.com/generator we select “Menu Generator”.
We give it a name in the “Function Name” field, for example: marabelia_menus. Do we want it to be suitable for “Child Themes”? We say yes. “Text Domain”: no need to write a translation, we leave it as is.
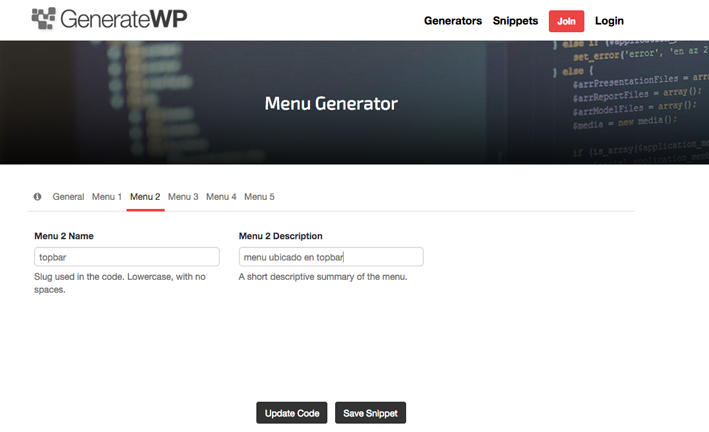
As we can see, we can create up to 5 menus, but we’ll just create 2. Click on “Menu 1” and name it “footer” — you can name it whatever you want, but it must be in slug format, lowercase and no spaces. Add a short description.

We’ll name “Menu 2” as “topbar” and add a brief description too (this won’t be visible anywhere — just for us).
Very well, now click “Update Code” and the code will be generated. In your case, you may only want one menu, so your code will look different:
if ( ! function_exists( 'marabelia_menus' ) ) {

// Register Navigation Menus

function marabelia_menus() {

$locations = array(

'footer' => __( 'Menu located in footer', 'text_domain' ),

'topbar' => __( 'Menu located in topbar', 'text_domain' ),

);

register_nav_menus( $locations );

}

add_action( 'init', 'marabelia_menus' );

}
2 – Install the Code Snippets Plugin
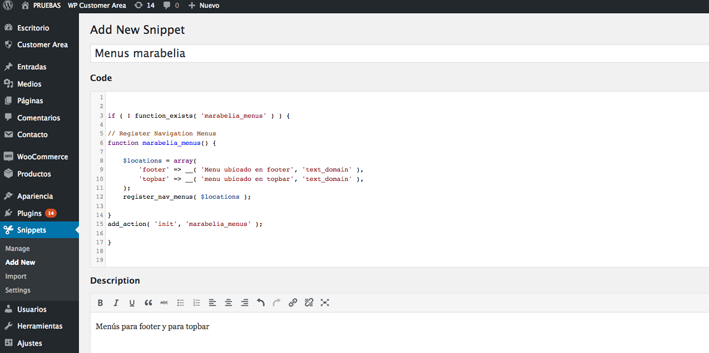
We need to integrate the generated code into WordPress. We *could* do it directly in the functions.php file of our theme (specifically, the child theme), but… what happens when we change the theme? We’d lose everything or have to dig through functions.php to copy and paste it again. With the Code Snippets plugin, we can keep all these “snippets” well-organized, activated or not, in a separate plugin. So even if we update or switch the theme, we won’t lose anything. Once installed and activated, we create a “New Snippet”, give it a name, paste the code we generated, and write a short description. Tags are useful for searching later when we have many snippets. Click “Save changes and activate”.
3 – Creating New Menus
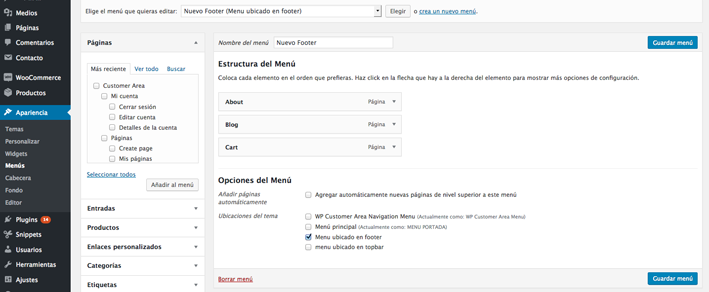
In our case, we created 2 new locations: one in the footer and one in the topbar. Let’s focus on option 1, with the Twenty Twelve theme activated. In Appearance > Menus, we create a new menu called “new footer” and add the pages we want, in this case “About”, “Blog”, and “Cart”. Two new locations now appear: “Menu located in footer” and “Menu located in topbar”.
Here, we’ll assign the menu to the footer and leave the “Menu located in topbar” blank — that one was generated for the X theme.
4 – Placing the New Menu in Our Twenty Twelve Template
So far, we’ve done a lot, but the menu doesn’t appear in the footer yet. We’ve already created it with our desired pages, but how do we display it? Now we need to place it inside our template, and for that we need this code:
<?php wp_nav_menu( array( ‘theme_location’ => ‘topbar’ ) ); ?>
In our case, it would look like this:
<?php// ============================================================================= // HEADER.PHP // —————————————————————————– // The site header. Variable output across different stacks. // // Content is output based on which Stack has been selected in the Customizer. // To view and/or edit the markup of your Stack’s index, first go to “views” // inside the “framework” subdirectory. Once inside, find your Stack’s folder // and look for a file called “wp-header.php,” where you’ll be able to find the // appropriate output. // ============================================================================= ?> <?php x_get_view( x_get_stack(), ‘wp’, ‘header’ ); ?>>
Now let’s locate the .php file that contains the footer. Using FTP, go to wp-content/themes/twentytwelve and you’ll find footer.php. Download this file and save a backup in case something goes wrong. Copy it to a .txt file and add our code snippet, then upload it and overwrite the existing one.
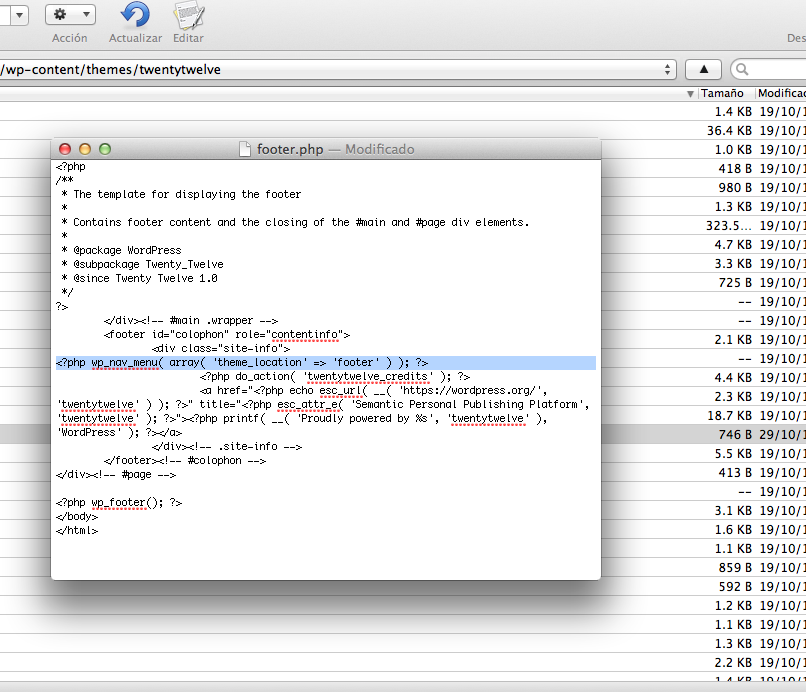
Update the site and your menu should now be visible in the footer!
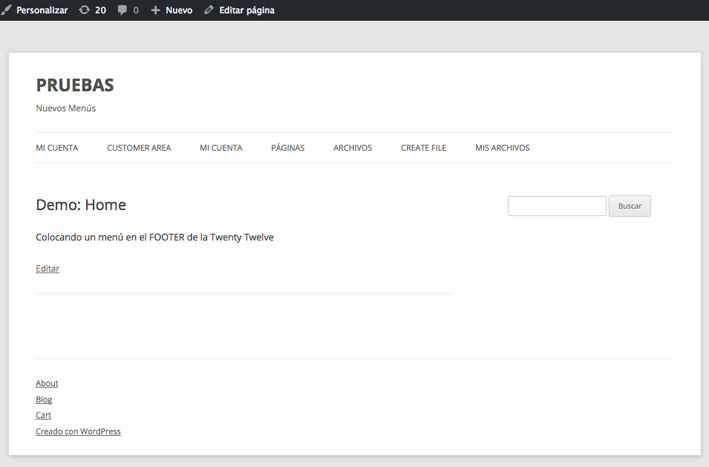
It shows up underlined and vertically aligned. To style it differently, you’ll need to edit the CSS. If you don’t know how to do this, we’re working on a new tutorial to explain it.
In our case, we’re working directly on the main theme since it’s a test site. But ideally, you should do this in your child theme. Otherwise, when you update the theme, your footer menu will disappear — or you’ll need to remember to copy and paste the code again into footer.php. If you don’t know how to work with child themes, we recommend you carefully read this post.
5 – Placing the New Menu in Our X Theme Template
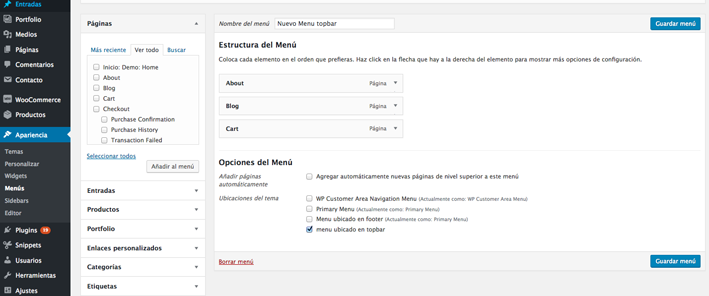
Activate the X Theme and of course in “Customize” > “Header”, enable the Topbar. Then go to Appearance > Menus, create the desired menu, name it for example “New Topbar Menu”, add the pages you want (in our case the same: “About”, “Blog”, “Cart”) and check “menu located in topbar”. Save the menu.
Now go back to the code snippet we need to paste where we want this menu to appear in our template. Recall the ID we set in the snippet:
<?php wp_nav_menu( array( ‘theme_location’ => ‘topbar’ ) ); ?>
Where should we paste this so the code is visible? Intuitively, it should go in header.php, so let’s open that file via FTP: ../wp-content/themes/X. You’ll find this:
<?php
// =============================================================================
// HEADER.PHP
// —————————————————————————–
// The site header. Variable output across different stacks.
// Content is output based on which Stack has been selected in the Customizer.
// To view and/or edit your Stack’s markup, go to “views” inside the
// “framework” subdirectory. Then locate your Stack’s folder and look for
// a file called “wp-header.php,” where you’ll find the appropriate output.
// =============================================================================
?>
<?php x_get_view( x_get_stack(), ‘wp’, ‘header’ ); ?>
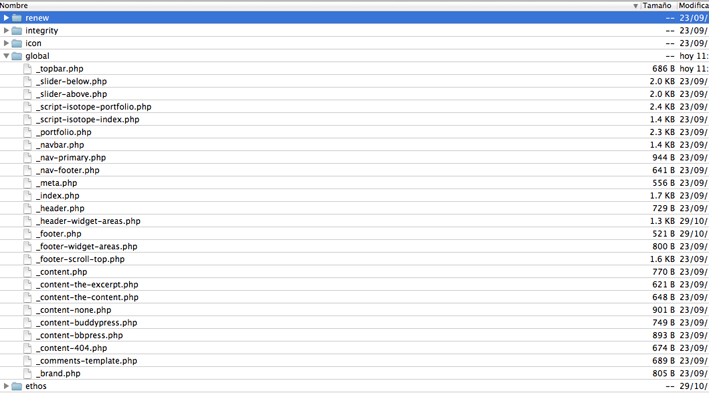
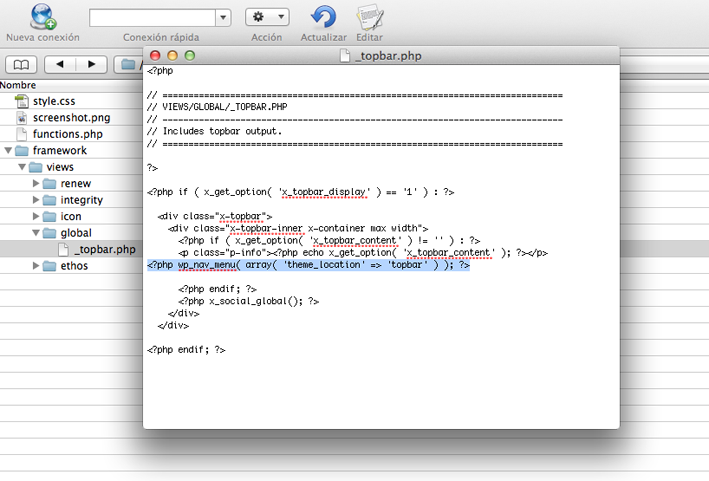
It basically tells us that we need to go to the “Framework” folder, and inside it, to “Views”, where we’ll find different folders named “Ethos”, “Icon”, etc. These are the design options offered by X Theme. Depending on the one we selected in “Customize”, we can find the header.php page in one folder or another. But be careful! Because there is also a “global” folder in the directory, and if we go inside, we’ll find a file called topbar.php — and that’s where we need to place our code snippet.
If we want to keep this menu even after updating the theme, we must use our X Child Theme. X Theme already provides it with the necessary folders created, so we download topbar.php from our X Theme, edit it, and upload it to our X Child Theme — the one we have activated. It should look like this:
We update our website and voilà! Our menu is now in the topbar. Just like with the first menu, we now need to style it with CSS in our Child Theme to align it horizontally, change the color, etc. — but that will be in our next tutorial. Coming soon :)!
