


Plugins WordPress, Woocommerce, Wordpress
Create a product with variations in WooCommerce

Sep
Products in an online store are sometimes simple, but often the same product can have several sizes, different colors, measurements, etc. It may even happen that depending on these variations the price is higher or lower, or we want to show different images according to the selected color.
Let’s see step by step how to create these attributes and variations for your WordPress online store. If you prefer, you can watch the video directly 🙂
1-Creating a product
In our WP dashboard, inside “Products” we will click “Add Product” and start with a simple one. We give it any name we want, in this case: “T-shirts”, choose the category, a reference number (SKU), a price… let’s save it for now and in the next step we create the attributes.
2-Creating attributes
We go back to our WP dashboard, inside “Products” again we click “Attributes”. We write the attribute “Color” in this case. We press the “Add attribute” button. This way we can create as many as we want: “size”, “fabric”, “dimensions”, etc. etc.
Now let’s edit the “Color” attribute and create the available colors for all the products in the store. Later, for each product we will define which colors are available.
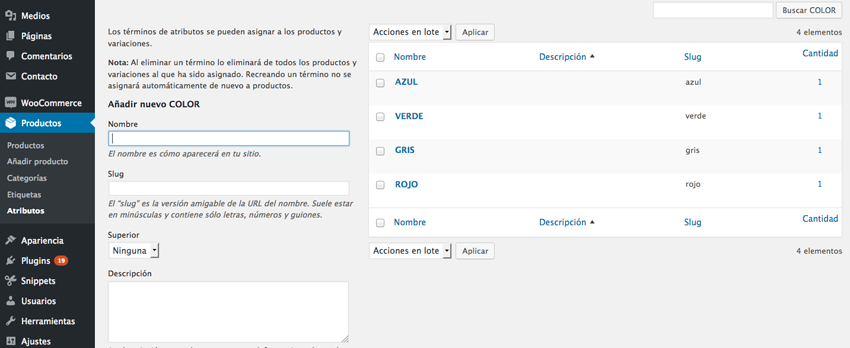
In this case, we add 4 colors: blue, green, gray, and red.
3-Adding attributes to our product
We go back to our product “T-shirts” and change the product type from “simple” to “variable”, we see that the price disappears — why? Because now we must choose what price the product will have for each variation. Now we go to “Attributes” but careful, not the “Product” menu tab but inside the “product data” box where we are working.
There we see the dropdown “Add attribute” and we can choose any attribute we have created. In our case, “color”. Now we must select the colors we created previously, we can click “select all” or type them one by one. Then we check the box “Used for variations” and save.
4-Creating variations
Still in our product editing screen, just below “Attributes” we have the “Variations” tab with a dropdown “Add variation” — we choose “Create variations from all attributes” and click “Go”.
A message appears: “Are you sure you want to link all variations? This will create a new variation for each possible attribute combination max. 50 per run?” We accept. If we want to create so many combinations that the result is more than 50, we can do it in several runs, first add the color attribute and create all combinations, then size, etc.
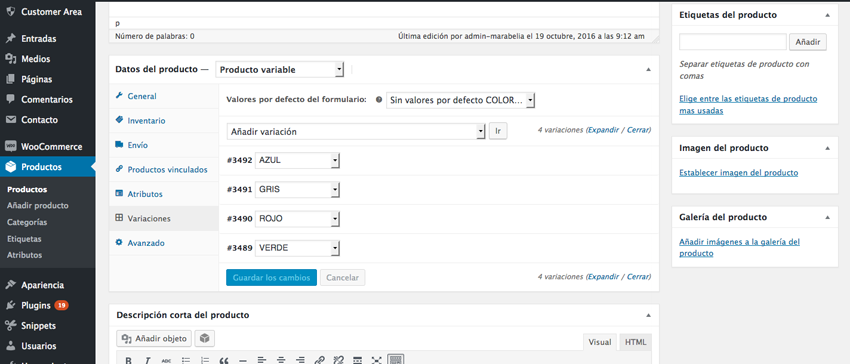
When we hover over each variation, a small tab appears, by clicking it we can edit each variation. We start with blue, assign the corresponding image, a price, a reference number (SKU), etc., and do the same with all colors.
4-Publish the product
We choose the product’s featured image; in this case, ideally a photo of all the T-shirts together, but since we don’t have it, we use the red T-shirt as a sample. We write the description … the more complete the better! And now it’s ready to sell 😉
TUTORIAL VIDEO
For any questions, feel free to comment 🙂
IMPORTANT UPDATE:
ERROR IN THE VARIABLE PRODUCT FEATURED IMAGE AFTER WOOCOMMERCE UPDATE / HOW TO FIX THE PROBLEM
After the latest WooCommerce updates, it is possible that the VARIABLE PRODUCT IMAGE DOES NOT SHOW. To fix this, we must access the FTP of our website and download the single-product.php file located inside woocommerce/templates:
wp-content / plugins / woocommerce / templates / single-product.php (Download it)
Once downloaded, go to your WordPress theme folder and inside its WooCommerce subfolder, locate the file called single-product.php and replace this file with the one you downloaded:
wp-content / themes / [your-theme-name] / woocommerce / single-product.php (Replace this file with the one you downloaded)
Everything will return to normal and you will see the correct image corresponding to each product variation when selected.