


Creativity and design, Wordpress
CSS for Dummies: Changing Fonts and Titles in WordPress
Basic CSS Mini-Course for WordPress
If you’ve made it this far, it’s probably because you’re starting to build websites with WordPress and don’t know how to change some parts of the default styling for fonts, headings, or links in your theme.
Don’t worry—it’s actually quite simple, but first we need to understand what CSS is and where and how to modify it.
What is CSS?
CSS is the code that defines the entire style of a website: fonts, colors, sizes, spacing, etc.
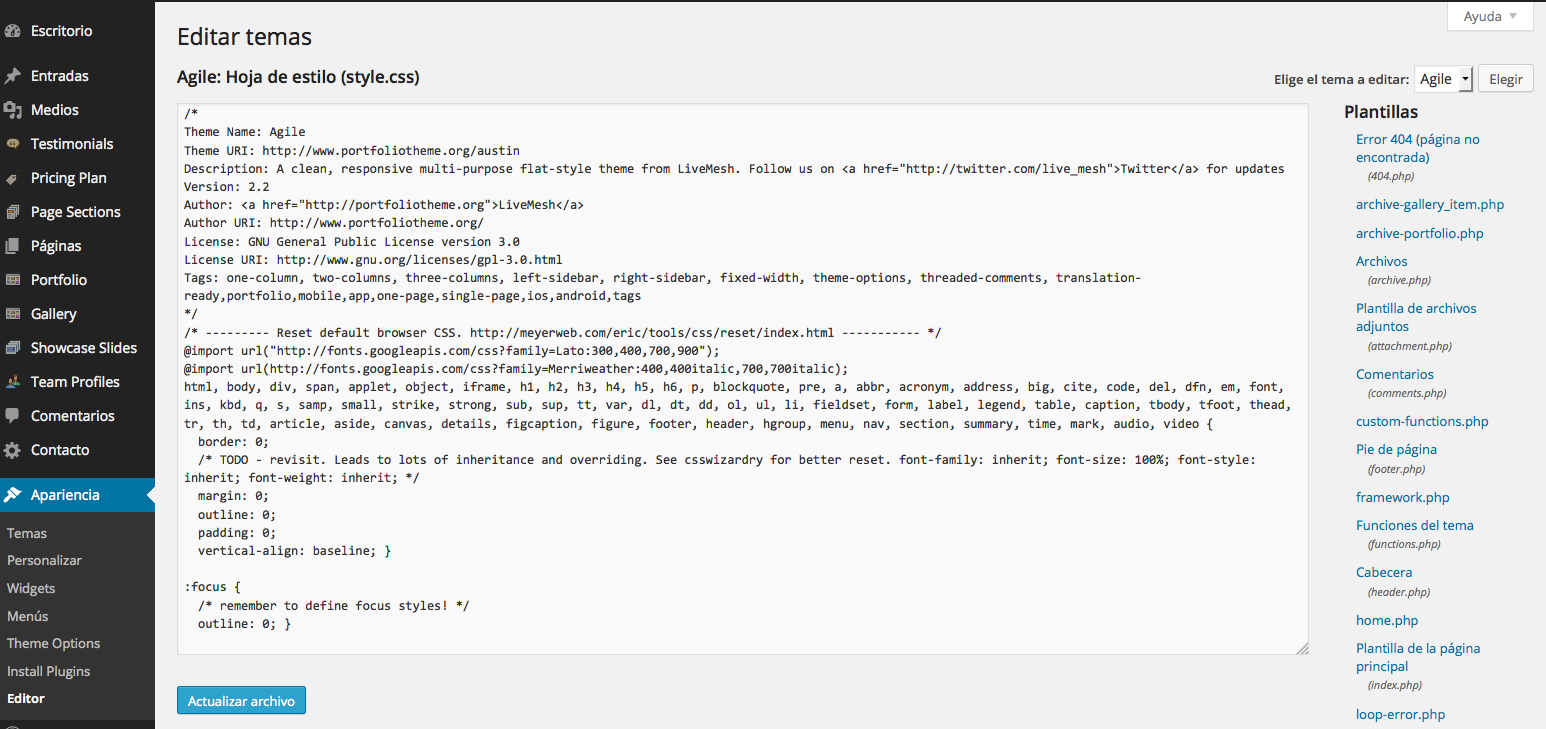
Where is the CSS located?
CSS is usually predefined in a file called style.css
How do we change the CSS in WordPress?
We can modify CSS in four different ways:
- Define the CSS in the style.css of our WordPress theme via Appearance/Editor/style.css
- Define the CSS in the child.css of our WordPress theme
- Define the CSS in our theme’s custom CSS panel, usually found in the WordPress dashboard under a path like Appearance/Theme Options/Customize CSS.
- Define the CSS using the Jetpack plugin (or the free Slim JetPack) and activate the custom CSS module.
Any of these options will work equally well (they will affect the theme’s style), but if you go with the first one (editing the main stylesheet: style.css) you won’t be able to update your theme or you’ll lose all the changes you’ve made.
Since most modern WordPress templates come with a built-in CSS customizer, the most recommended and convenient method is to make changes from there, because you can update the theme later without losing your CSS modifications and still retain the original theme CSS (so you can experiment without fear!).
That said, let’s get started!
Before starting: Organize your workspace
When making changes or adding new CSS styles, I recommend keeping three browser windows open:
- The Appearance/Editor/style.css window.
This is where the original theme style resides. We won’t modify this file, but it will serve as a guide and we’ll copy styles from here to edit.
2. The Appearance/Theme Options/Customize CSS window
This is where we’ll make the changes, without fear: you can always delete them and the theme will revert to its original style.

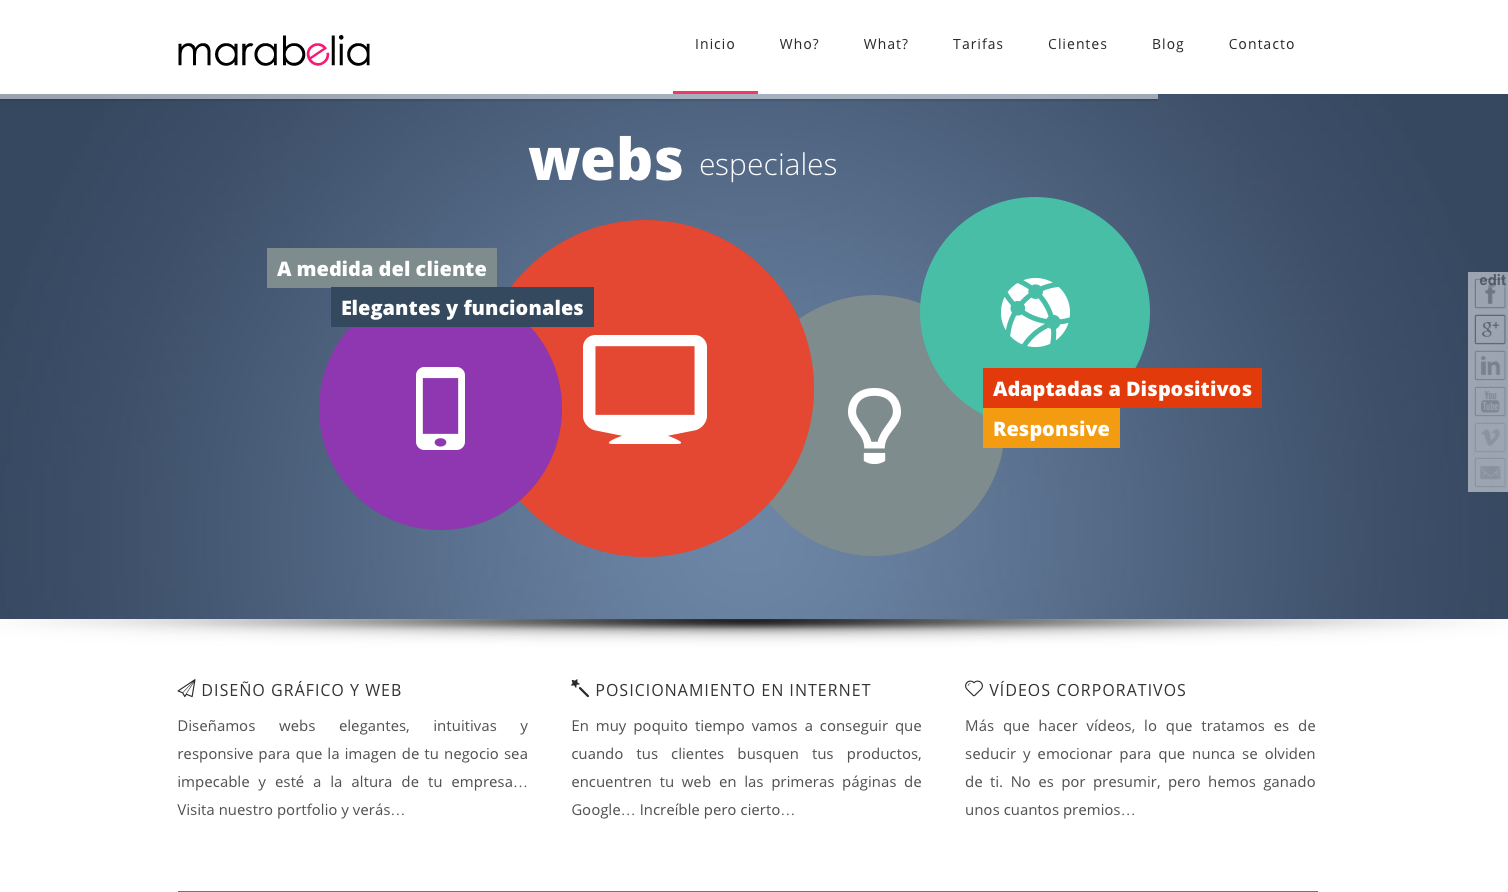
3. Your website window
This way, we can see the changes as we make them…
Next step: Developer plugin for your browser
It’s essential to have the Web Developer plugin installed in your browser. If you don’t have it yet, what are you waiting for?
- Firefox: https://addons.mozilla.org/es/firefox/extensions/web-development/
- Chrome: It comes preinstalled in the latest versions. If you don’t have it: update Chrome!
This will help us locate elements (to know what they’re called) and test how the CSS changes will look before applying them.
To inspect an element, once the plugin is installed, hover over any item on a webpage and right-click, selecting the “Inspect element” option:
Something like this will appear at the bottom of the page:
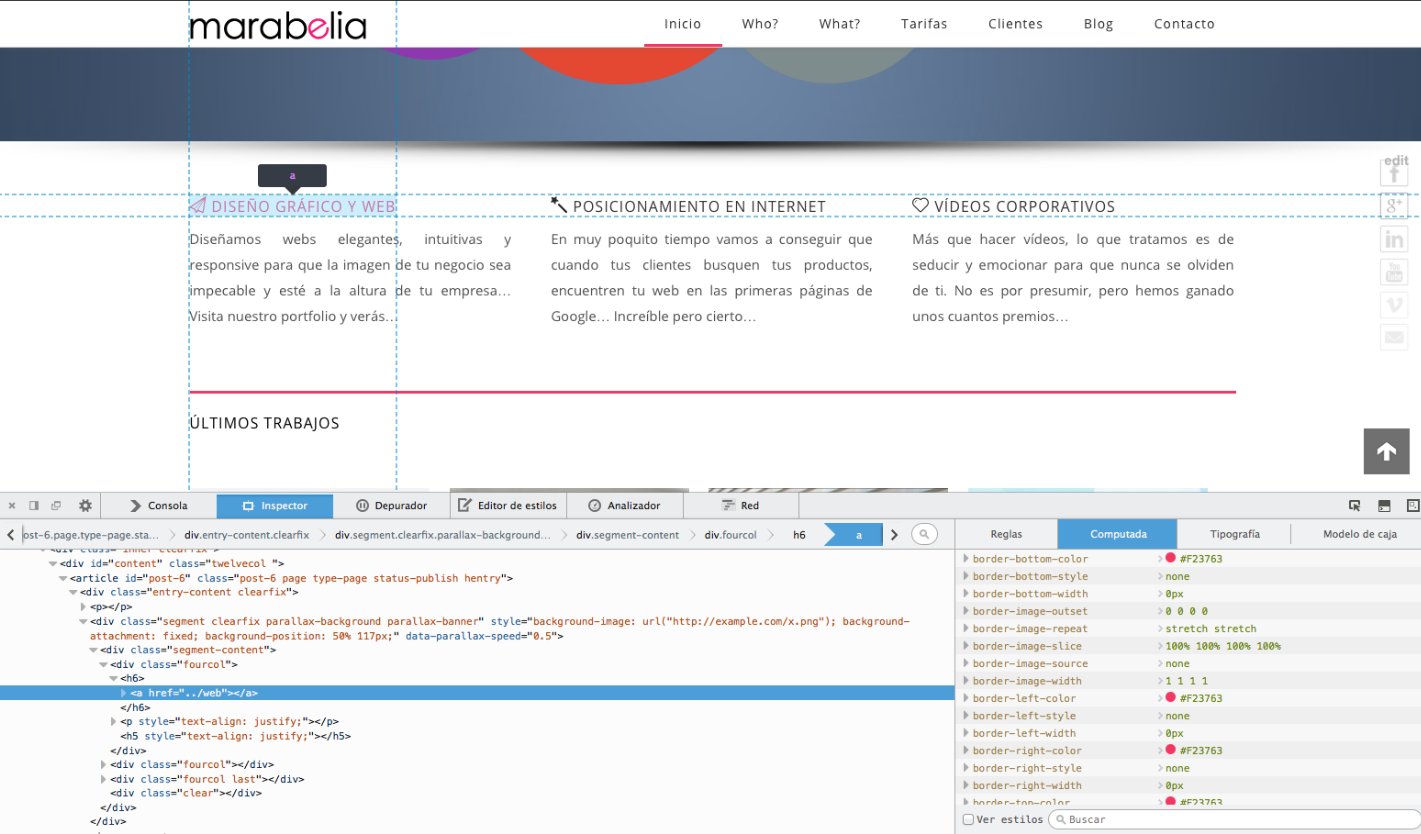
Select “Rules” on the right:
We can see the element names and where they’re located, but we can also modify the CSS parameters to preview how the changes will look once applied.
Don’t worry—changes made here will never be saved in the theme.
For example, try changing the color of an element. Just hover over the (#number) and give it a different color code.
Writing your first lines of CSS:
How to change the default font style of your entire website (“body”)
Let’s say your website has a predefined font or page titles (headings) with a font family, color, or size that you don’t like.
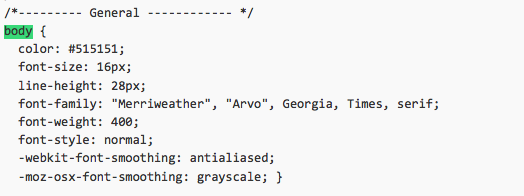
The general typography of your website is defined as “body”, so we’ll go to the style.css file and locate the paragraph that defines its properties.
- In your WordPress dashboard: Appearance / Editor / Style.css type command+f or from the browser (Firefox, Chrome…) go to Edit / Find
- Search for the word “body“ and you’ll find a paragraph similar to this one:
- Select the whole paragraph and copy it into Appearance / Theme Options / Custom CSS
- As explained before, the advantage of modifying from custom CSS (or from child.css) is that this style takes precedence over the main style (style.css), but the main style is still preserved. So if something doesn’t look right, you can delete the generated paragraph in custom CSS and revert to the original style.
- The basic parameters are easy to identify, but here’s a link where you’ll find all the basic CSS properties explained.
- For example, if you want all your website’s text to be thinner, you should modify the line:
![]()
And replace it with:
![]()
- If you want to change your font color, you can choose a new color here. Then simply update it:
![]()
![]()
- You can save changes in custom CSS and refresh your site to see the updates.
How to change the default style of headings (H1, H2, H3)
The generic headings of your site are defined as “H1”, “H2”, “H3”, and so on…
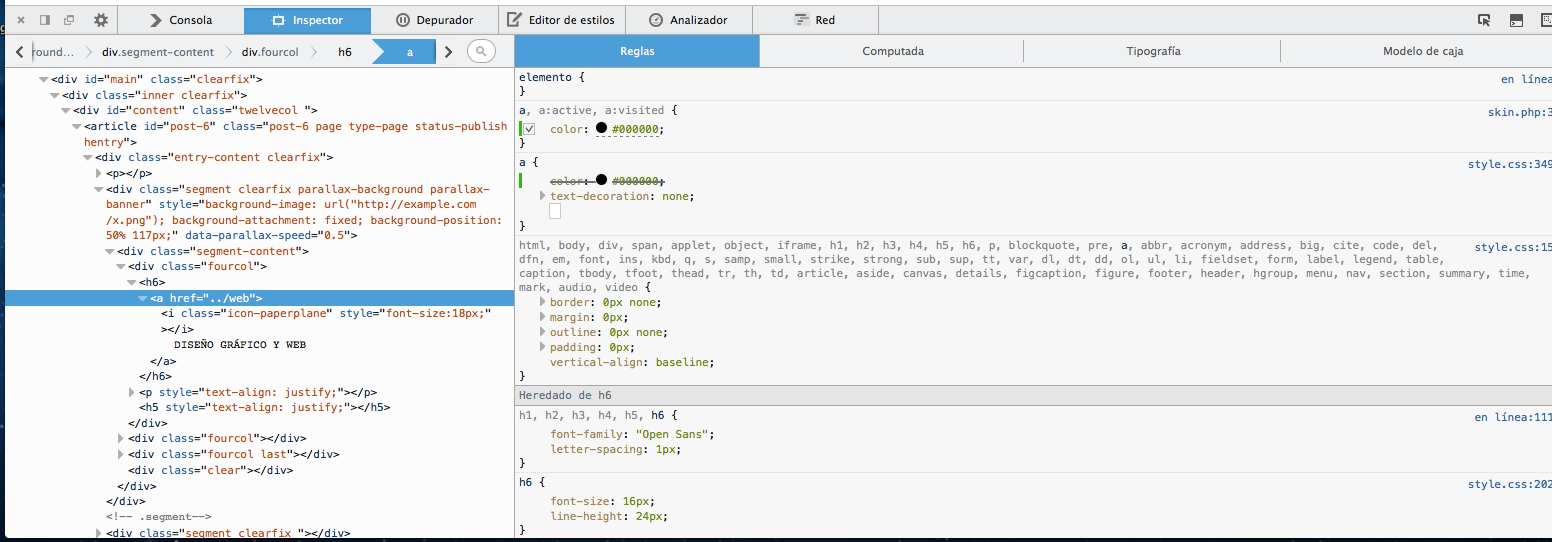
If you want to locate a specific heading and don’t know what class it belongs to, go to your website, hover over the element, right-click and choose “Inspect”.
At the bottom, in the “rules” section, it will show you which class it belongs to:
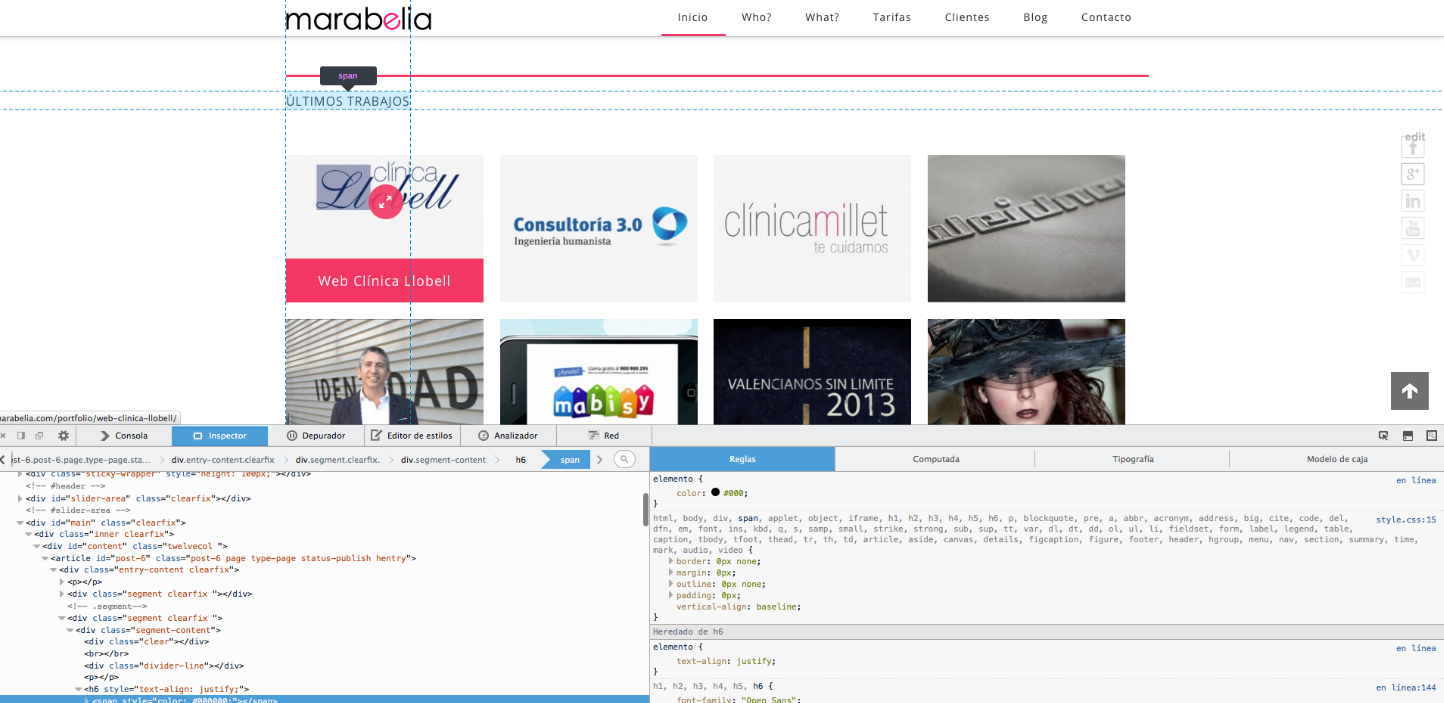
Here we see that our title “Últimos trabajos” (Latest Work) is inherited from the H6 element, so if we want to change this title:
- In Appearance / Editor / Style.css type command+f or from the browser (Firefox, Chrome…) go to Edit / Find
- Search for the word “H6” and you’ll find a paragraph similar to this one:

- Select the entire paragraph and copy it into Appearance / Theme Options / Custom CSS
- Edit the general heading styles /* Heading styling */ or for a specific heading like h1, h2, h3, or in this case, h6.
- Save the changes and voilà! Refresh your website to see the result!