


Plugins WordPress, Wordpress
How to define the page template in Toolset
Toolset is a WordPress plugin that allows you to create new post types (aside from the predefined ones like blog, products, and portfolio) without needing to rewrite your theme’s PHP.
Its possibilities are many. It lets you reorganize your website’s content into independent sections that you can create, assigning them new fields and taxonomies (categories, tags, etc.).
In its simplest use, Toolset will help us create a new section of the website where we can upload new types of entries separate from the blog, such as projects, tutorials, or any other content area we want to distinguish from the main pages using a new generic URL. For example: https://mywebsite/projects/new-project.
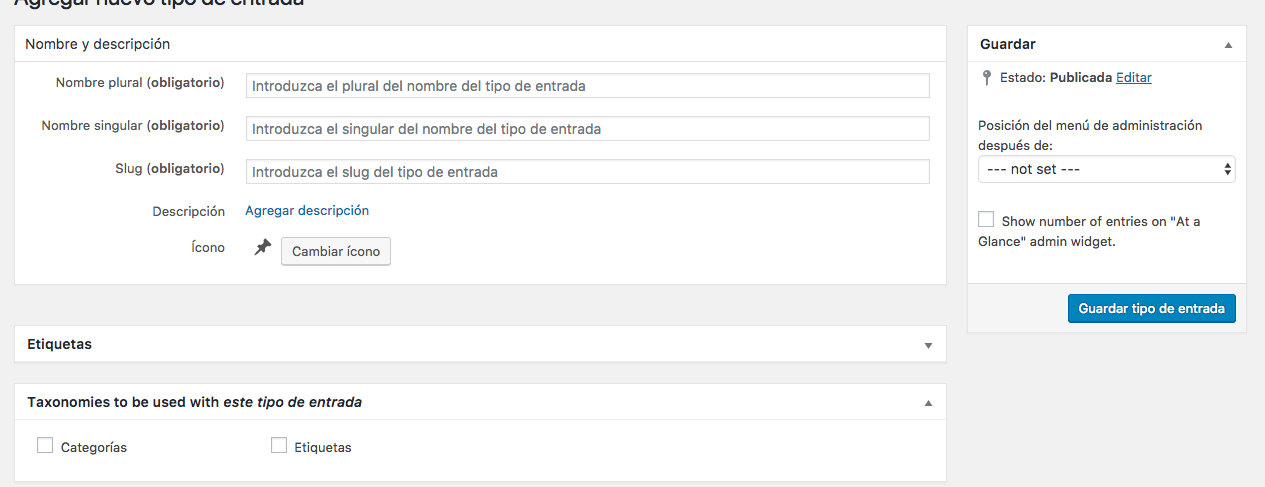
Initially, its use is very simple. We add the plugin from the WordPress repository. We activate it and from our WordPress dashboard, under the Toolset section, we add a new post type:

We assign it a plural and singular name, and a slug for the URL, mark the taxonomies we want to appear in this post type, and set its position in our admin panel.
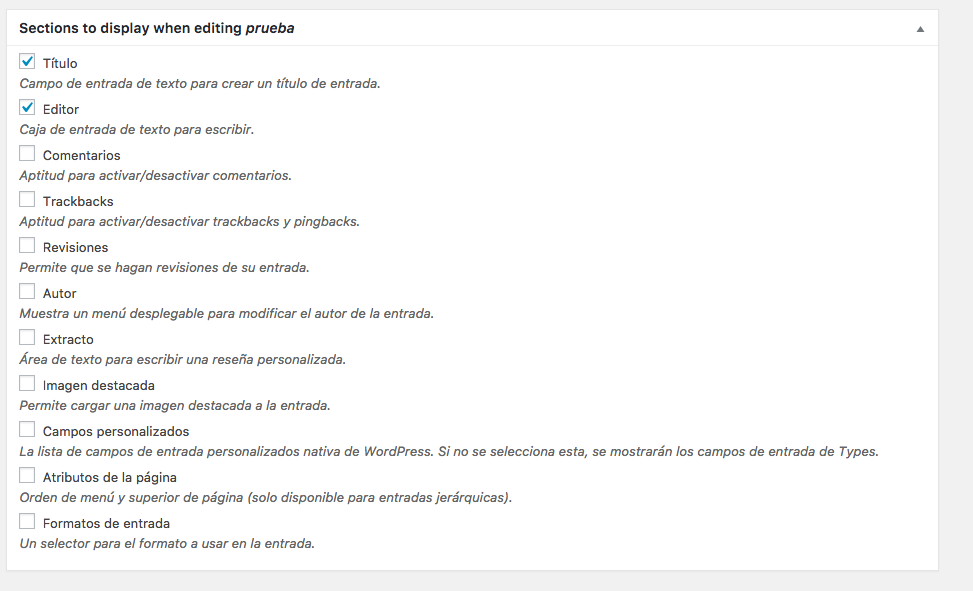
Below, we check the sections or fields we want this new post type to have. For example: Title, editor, featured image, etc.
We save this new post type and most of the work is done.
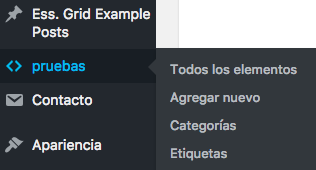
We’ll see that a new section has appeared in our WordPress admin menu with the name we assigned, for example “tests”:
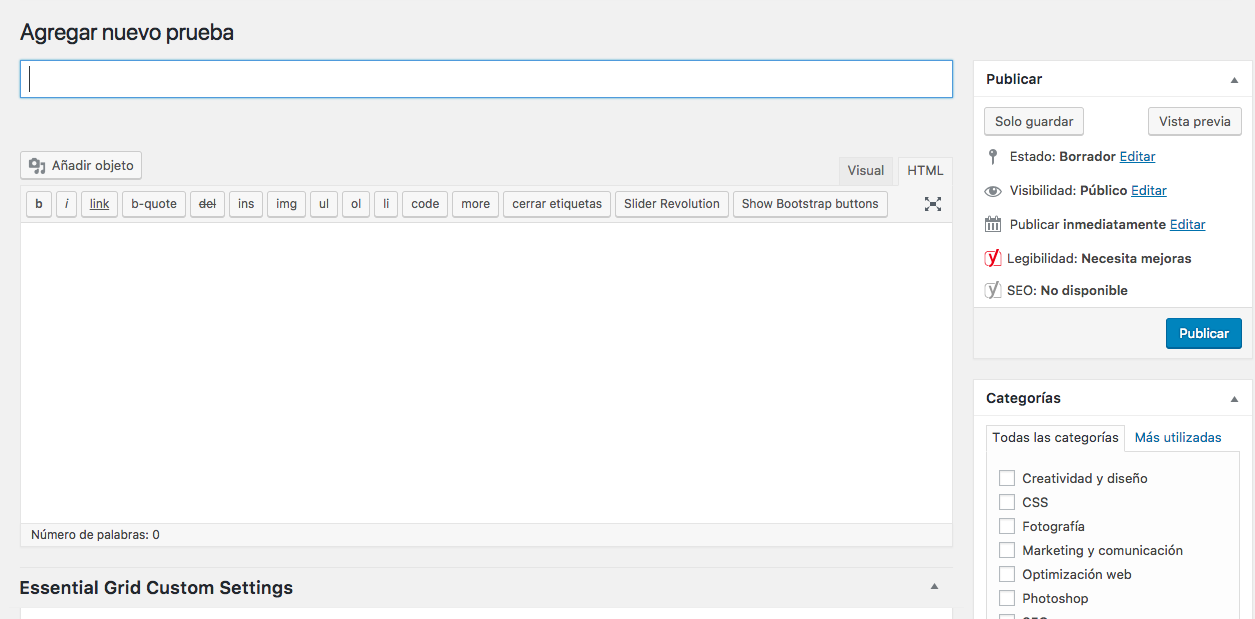
Now we’re going to add a new item and we can create a new entry within the category we’ve created:
Now the problems begin.
By default, this new entry will use the default template of our site, which is usually the predefined page for the blog: a page with a sidebar that inherits parameters from the blog page.
This may not work for our new section because we want a different kind of page template, such as a full-page layout like the one we use for other general pages on the site.
How to switch to a different page style in Toolset
There are many ways to do this in PHP and also several plugins that let us do it without touching any code, but the simplest method we’ve found at Marabelia is using the Custom HTML/PHP Post Templates plugin by Stephen Afam-Osemene. This plugin is rarely updated, but updates are not really needed due to its simplicity, so we can install it without concern.
The next task is intuitive and quite simple: we must locate the page style we want to use as the default for our new post type.
Where do we find the page styles?
We need to go from the WordPress side menu to Appearance > Editor > our parent theme (assuming we’re working with a child theme, as we should…)

If prompted, we confirm that we want to update the file (don’t worry):

On the sidebar, the theme files will appear:

Intuitively, we locate the file corresponding to the new page style we want to create. For example, if we want a full-width page without a sidebar, in this case it would be `page-blank.php`. We click on that file and view the PHP code for the page template:

From here the task is very simple. We need to copy this code into a plain text file and save it to our computer desktop with a new name, e.g., new-page.php.
We exit the editor without saving changes or doing anything else.
Now let’s activate the Custom HTML/PHP Post Templates plugin, and once it’s active, go to the WordPress sidebar: Settings > Custom templates:

We check the templates for which we want to generate a new page file, for example “tests.” Then we select the page file we saved on our desktop (new-page.php), upload it, and save the changes.
That’s it!
There’s nothing more to do. From this moment on, we have a new page template assigned to the post type we created with Toolset.
Useful tip:
With this plugin, you can also change the default page style for the blog or portfolio.
You can even change the default template for WooCommerce products, as long as you base it on another template already created in your parent theme.