


Creativity and design, Graphic design
How to make an Andy Warhol-style portrait – very easy!

Aug
Here we show you a very simple way to create a portrait in the pure Warhol style. For today, I have chosen a photograph of the former scandalous Disney girl turned Goddess of twerking… the rebellious Miley Cyrus in one of her most characteristic gestures 😛

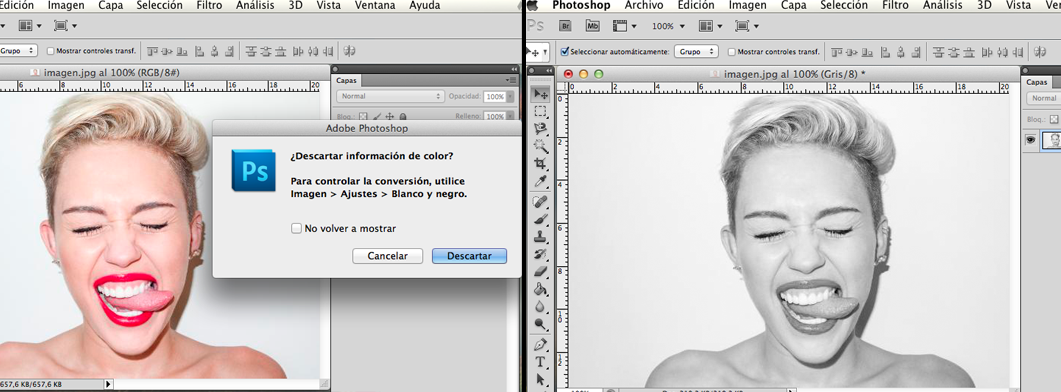
1. In the top menu go to Image -> Mode -> Grayscale and click “Discard,” then Image -> Mode -> RGB Color.
2. Top menu Image -> Adjustments -> Levels and set the necessary parameters. The goal is for the whites to look whiter and the blacks to look blacker. Save.
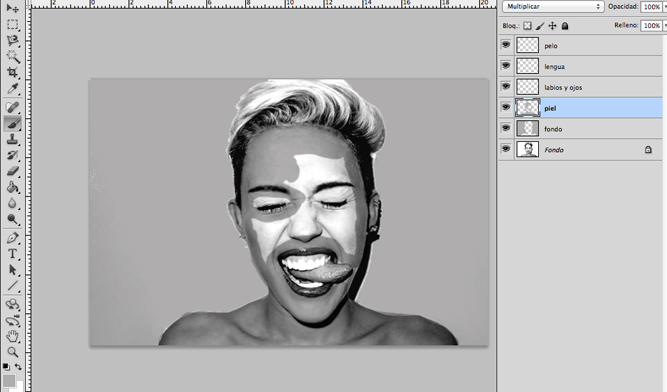
Now go to the top menu Layer -> New -> Layer. Create as many layers as you want to color. In this case, I created 5 and named them: “Background,” “Skin,” “Lips,” “Eyes,” “Tongue,” and “Hair.” I have to set all layers to Multiply blending mode.

3. On the Background layer (original image, the one with the lock) I select the background using the Magic Wand. This is very easy if the entire background is the same color; another option is to select the silhouette with the magnetic lasso, then Ctrl + I to invert the selection. Now select the new layer named “Background” and pick a light gray tone in the color palette. The next step is to fill the selected area with the Paint Bucket. Press Ctrl + D to deselect. Now go layer by layer and fill areas (hair, lips, etc.) with the same gray color using the Brush tool.
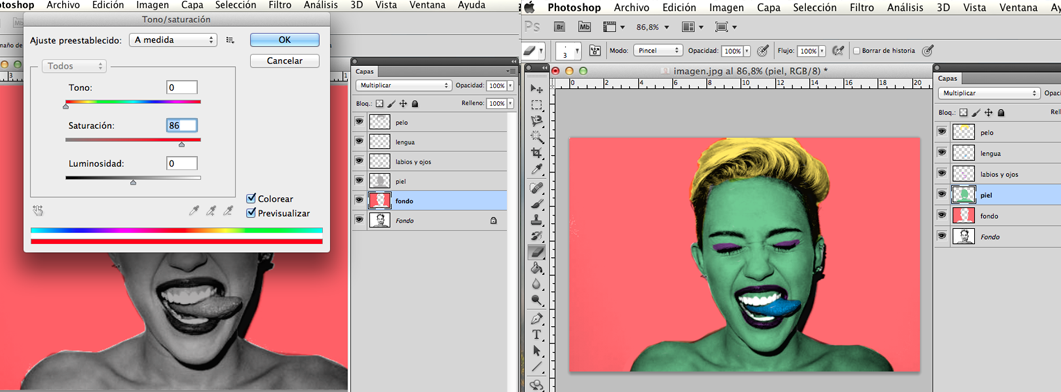
4. Now, layer by layer, make sure they are in Multiply blending mode and go to the top menu Adjustments -> Hue/Saturation and start changing the color. Be careful to have “Colorize” checked. When I had all the layers, I realized I liked the teeth white, so I erased that area. With the eraser and the brush in gray tone, you can go layer by layer and refine the edges.
5. Select all layers and merge them with Ctrl+E. To center the image, crop a little from one side and save with whatever name you want. In the top menu File -> New create an image with the desired dimensions depending on how you want your image to repeat. In this case, multiply by 3 in width and by 2 in height. In the top menu File -> Open choose the image you created, copy it 6 times with Ctrl+J. Move the layers and finish the composition.
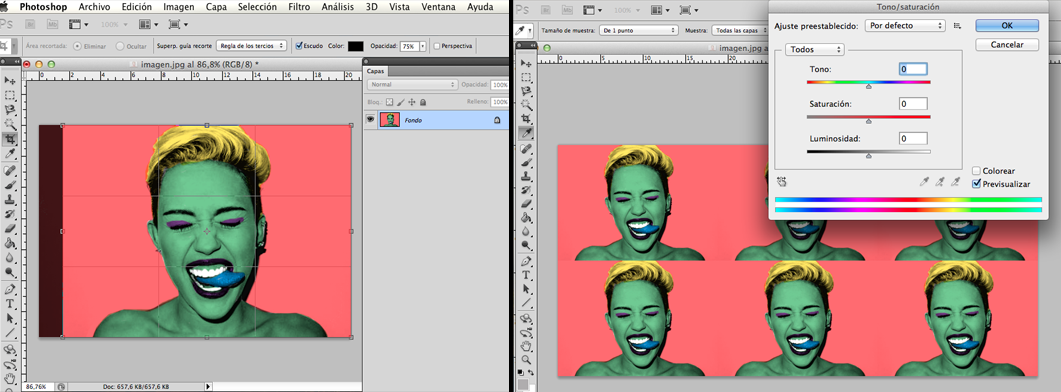
6. Once placed, go to the top menu Adjustments -> Hue/Saturation and tweak each layer to your liking. We got it!
